Illustrations for Tree of Life Pages
On this page, you will find information about
If you would like to use illustrations on your ToL pages that have previously been published or that were produced by other people, please also see the page about copyright issues.
Getting Your Own Images Ready for the ToL
 You
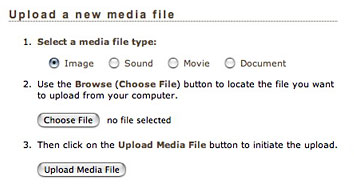
can upload your own images to the ToL database using the ToL
Media Manager (log-in required). The media manager is accessible
through links in page editing forms and from the Images/Media menu
in the right sidebar of any page in the ToL contributor documentation.
You
can upload your own images to the ToL database using the ToL
Media Manager (log-in required). The media manager is accessible
through links in page editing forms and from the Images/Media menu
in the right sidebar of any page in the ToL contributor documentation.
Images for the Tree of Life must be in electronic format. The ToL system can currently handle images in JPEG, GIF, or PNG format. The ideal size for master images is around 800 pixels in one dimension (see an example here), and file sizes should generally not exceed 2 MB. If you upload a relatively large master image, the ToL publishing system can autogenerate downscaled versions for use in different contexts, e.g., search results, title illustrations for branch and leaf pages, use in text sections as a single illustration or alongside other images, etc. In addition, a full-sized view of the master image is generally linked to the thumbnail in image captions. If you want to upload a large master but do not want to make it available for public access, you have the option of limiting the maximum displayed size of your image in the Image Versions section the Edit Image Data form.
You can get electronic images directly by using a digital camera, or you can digitize photographic prints or slides using a flatbed scanner (for prints) or slide scanner. Scanners are generally widely available in academic environments. If your department does not have a scanner, you can get scans done at copy shops and many photographic or office supply stores. If none of these options is available to you, we may be able to help. Send a request to
Once your images are in electronic form, you may need to edit them to prepare them for your web pages. This is best done using image processing software like the GIMP (free!), Adobe Photoshop, Paint Shop Pro, or CodedColor. In particular, you might need to adjust contrast, brightness, color saturation, and sharpness, remove dust specks, etc.
Editing Digital Images
We recommend saving several copies of each picture during the different stages of image processing. The details of how the different steps are achieved will vary with the image editing software you use.
- Save a back-up copy of the original, scanned image so that you can always go to back to that if needed.
- If necessary, rotate and flip the image so that it is in the appropriate orientation.
- Crop the image to eliminate scanned edges and any unwanted content.
- Remove any flaws in the image. This might include removing dust specks or distracting objects visible in the background.
- Adjust brightness, contrast, and color saturation.
- Resize the image, if necessary.
- Sharpen the image (if necessary), ideally using the unsharp mask technique. Be careful not to oversharpen your image, and do not sharpen your image more than once. Ideally, sharpening should be one of the last things you do, as information is lost from an image upon sharpening.
- Save a copy of the edited image in the native file format of your image editing software.
- Now you can save a copy of the image in a compressed format that can
be uploaded to the ToL database.
- Photographs should always be saved in JPEG format. Since the quality of your image will deteriorate each time you save it as a JPEG file, it is best to make all changes in the original file and to then use JPEG only for the final version that is to be published.
- For line art, drawings, and diagrams that do not contain subtle color gradients, PNG or GIF format may give you better results than JPEG.
At the end of this procedure you should have three different files:
- the original scanned image
- the rotated and edited image in the native file format of your image editing software
- the JPEG or GIF version of the image for publication on the web
Keeping a copy of the original scanned image will allow you to go back and produce a better edited version, if you realize at a later time that you are not happy with the way the image turned out. Keeping a copy of the edited image in a native file format will let you create another compressed version without having to re-edit the image.
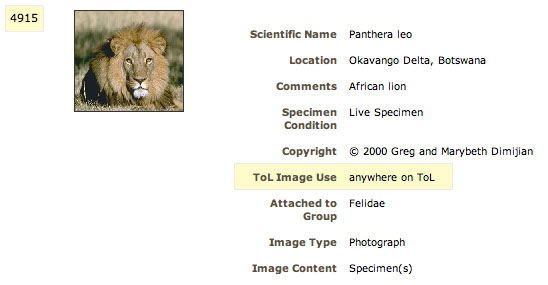
Using Images from the ToL Image Collection
Most ToL contributors use their own images to illustrate their pages. However, we now have an increasing number of image contributors who make their images available for use on other people's ToL pages. If you don't have suitable images for your page, or you are still looking for more images to illustrate a particular topic, you can check out the ToL image collection. On the ToL Image Search page, you can search for images according to a number of different criteria. Retrieved images are then shown along with a series of data, including an entry for ToL Image Use. If the ToL Image Use is set to restricted, the image is not available to other ToL contributors. However, if it is set to anywhere on ToL or share with ToL partners, you will be able to use the image on your ToL pages. Be sure to write down the ID number, which is listed next to the thumbnail. This will make it easy to locate the image when you assemble your ToL page.